
Some years back, “Inchies” were all the rage. Inchies are tiny pieces of art, one-inch square! (That’s 2.54 cm on each side.) A quick Google or Pinterest search will show you hundreds of these fabulous “bits of yay” as one artist put it. Some artists have gone a little bigger and gone into “Twinchies” which are two inches square. They are akin to Artists Trading Cards (aka ATCs). But that’s enough alphabet soup. Let me tell you how I fell in love with Inchies.
I was looking for a unique gift idea for my son Sam, and I had a lot of goofy snapshots. I could choose just one and have it printed on a mug or T-shirt – but it was so hard to choose! Or I could put a bunch into a calendar – but my son doesn’t use a paper calendar. Then I saw magnets. I could have my photos printed onto magnets! But I wanted something handcrafted and unusual, maybe a bit artsy. . .and I thought of Inchies.
It started as a set of magnets for Sam, but then I realized my husband would really enjoy his own set. And then I thought of my brother-in-law. And then there was my sister. And then I realized it could work for the Moms Group I belonged to – I had goofy photos of their kids, too!
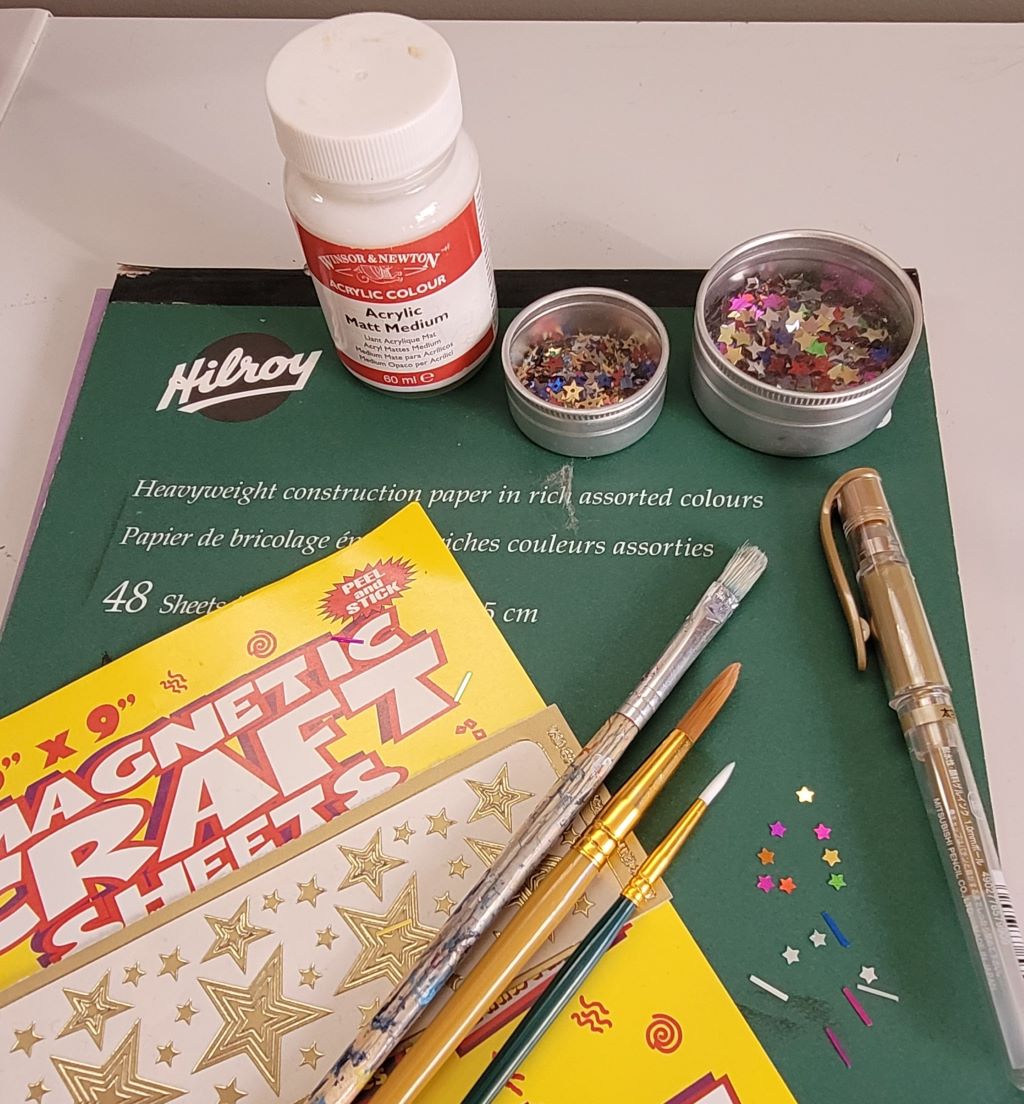
I gathered my supplies: scissors, peel-and-stick magnetic craft sheets, coloured construction paper, a gold pen, small shiny stars or sequins or “confetti”, acrylic craft paints in soft colours, a few brushes, an old paperback book for cutting out text, matte medium for gluing and sealing, favorite digital photos, and an inkjet printer with regular copy paper. This little jar of matte medium happens to be by Winsor & Newton, but you can get Liquitex or Golden brand.
I wanted each finished magnet to be 3.5 cm square. I began with the practical parts of the project.
The peel-and-stick magnet sheets are easy to cut with scissors. I cut out pieces of magnet, 3 cm square. For now, I left the peel-off paper in place, protecting the sticky side.
I cut various colours of construction paper into square pieces a little bit larger than the magnets: 3.5 cm square. I trimmed each corner at an angle to make it more attractive but also to guard against future dog-eared magnets! With my trusty gold pen I put an edging of gold around each of my construction paper squares. Then with a brush, I gently applied a thin coat of liquid matte medium to each square to give it more strength and protection. The liquid acrylic matte medium is easier to use than the gel, for this craft.
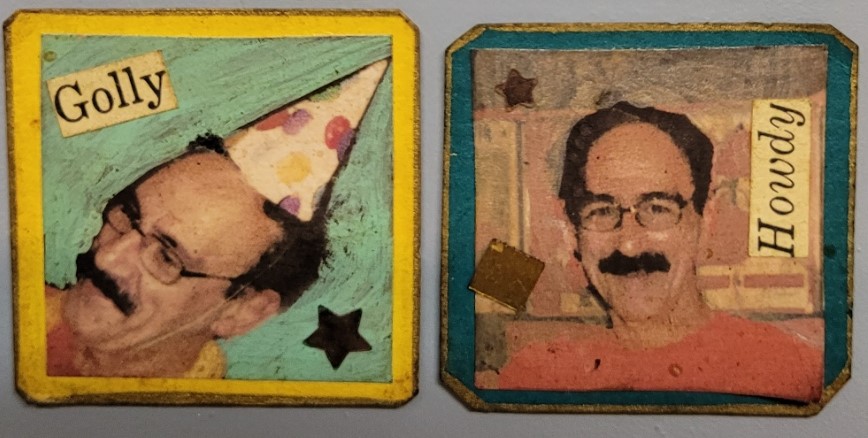
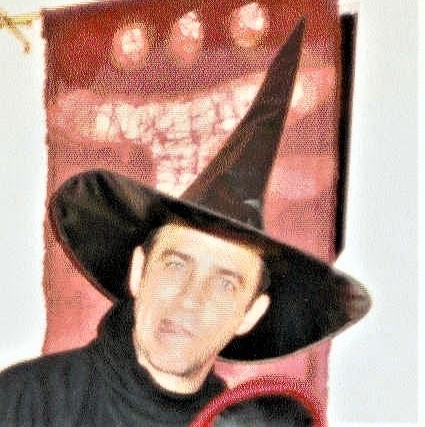
Now came the fun part: choosing the photos. I was looking for photos that showed some personality, humour, or a special event. Hallowe’en costumes provided lots of material, as did holiday hats, birthday parties, and big hugs.
I needed to shrink the photos to the small size I wanted, then print them in colour on regular copy paper using my home inkjet printer. Or you can do it at your local print shop. I used Microsoft Word, but you can use any document program. I moved the photos into the document and formatted each one down to 3 cm square. The measurement grid along the edges of the document helped with this. Then I printed them out at the “best” print quality on regular copy paper. This will result in a misty-looking image. It will not be the crisp photo quality of printing on gloss photo paper. But I like that misty “vintage” effect.
The photos need to be sealed too, just like the construction paper backing. I found it easier to seal all the photos on a page at once, but you could cut them out first and then seal them if you prefer. Using a soft brush, I gently applied a thin coat of matte medium, just going over the images once, in one direction. I let it dry (which happens quickly) then went over them again in the opposite direction. Matte Medium will dry clear and protect your images from water damage. Cut out your little square photos.
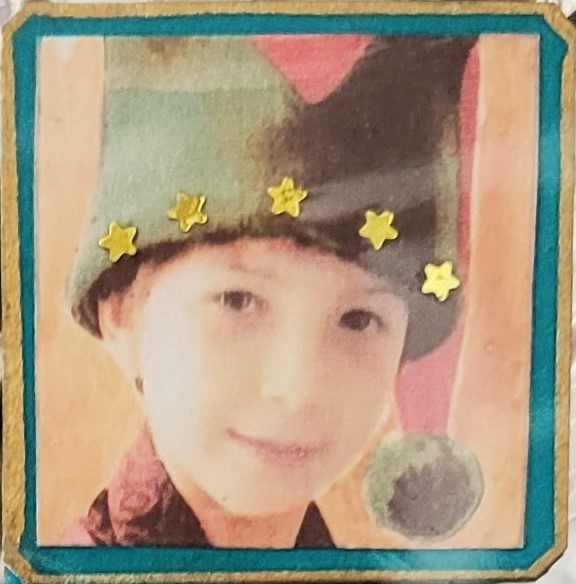
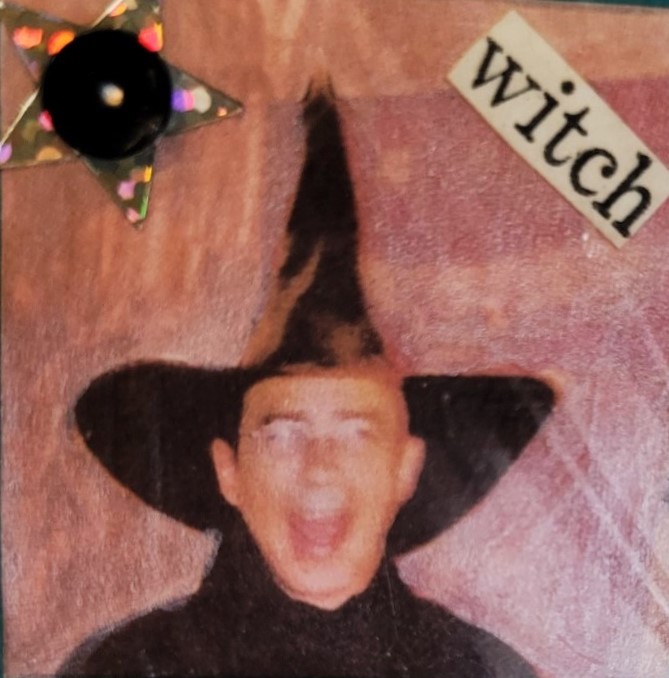
You will want a brush with a fine point for this next part. With your acrylic paint of choice, you are going to “paint out” the background in the photo so that only the figure of the person is left! Be sure to let it dry thoroughly. Here is an example of one of our Hallowe’en photos, and another from the same “shoot” done as an Inchie photo magnet.
(Tip: I cut out my photo images first. I found there is a difficulty with painting the backgrounds while all your photos are still on your printed-out sheet. Your paint will cover the edges of each one and make it trickier to cut out perfect little square photos! I discovered that the hard way, and then chose to cut them out before painting the backgrounds.)
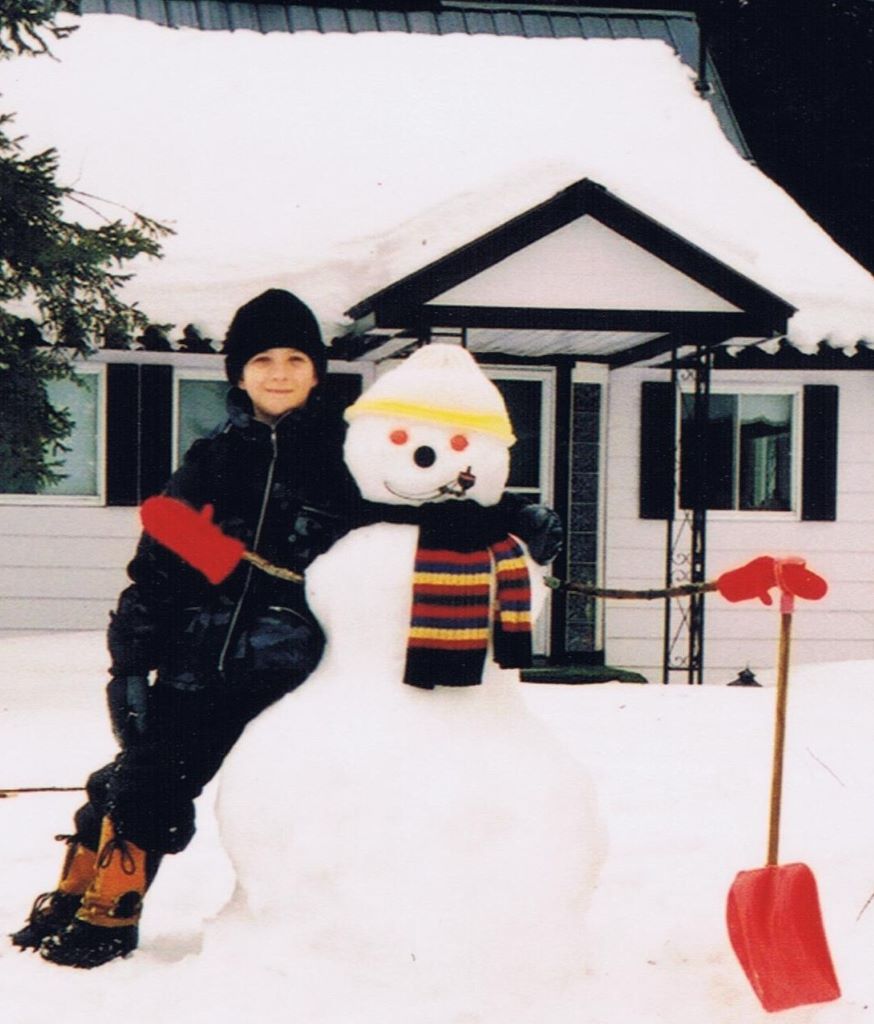
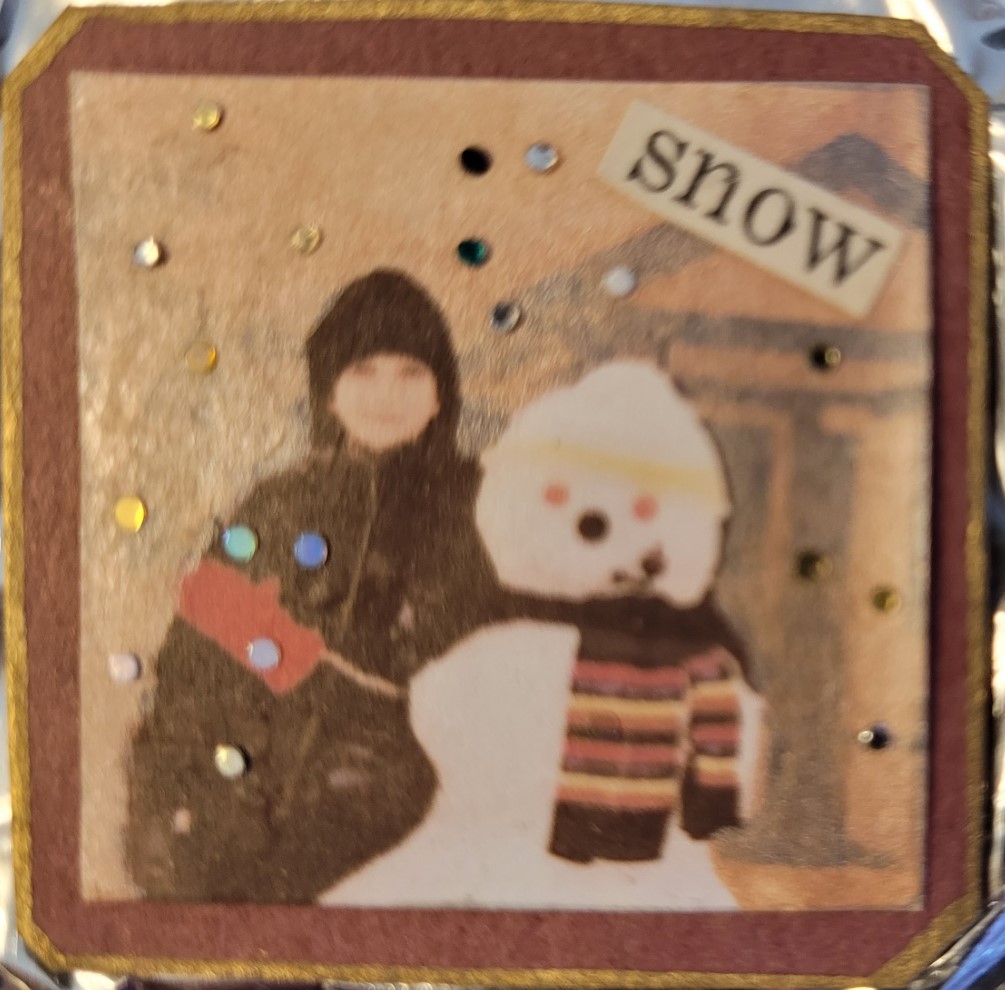
One of my paint choices surprised me by being quite translucent. Some of the background showed through. I liked that effect too. Here is the original photo of Sam with Maurice The Snow Man, and here’s how it turned out on the magnet.
As you can see, it does not have to be crisp and clear and perfect. And in fact it won’t be, when you are shrinking your photos down to such a small size. The magnet images are almost like little Impressionist sketches!
Now is the time to assemble. Matte Medium is a perfect glue for this project because it dries clear and non-shiny. Brush the medium on the back of your little photo – right out to the edges – and carefully centre it on one of your construction paper squares. Press it down so there are no air bubbles or lifting edges.
Have some fun finding and cutting out bits of appropriate text. If you don’t have a ratty old paperback to cut up, your library probably has books that are being discarded, or there are thrift shops and second-hand bookshops. Glue your text onto your image with matte medium – again a good glue choice because if any creeps from under your text, it will dry invisibly. You can also put a thin coat of matte medium over top of your text and it won’t matter if it goes over the whole image. It will just be another layer of protection.
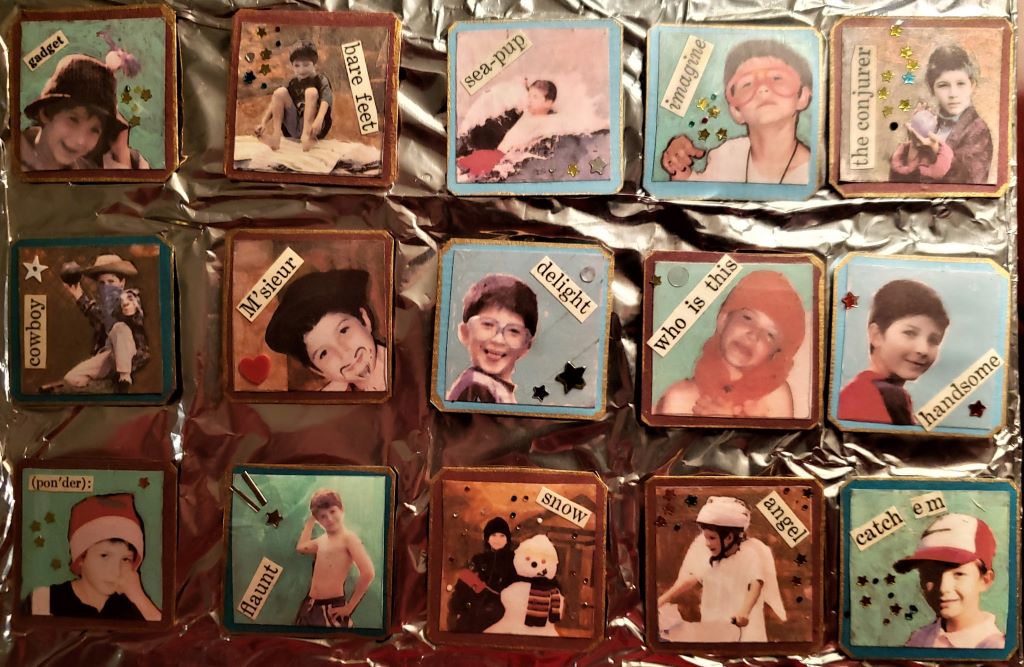
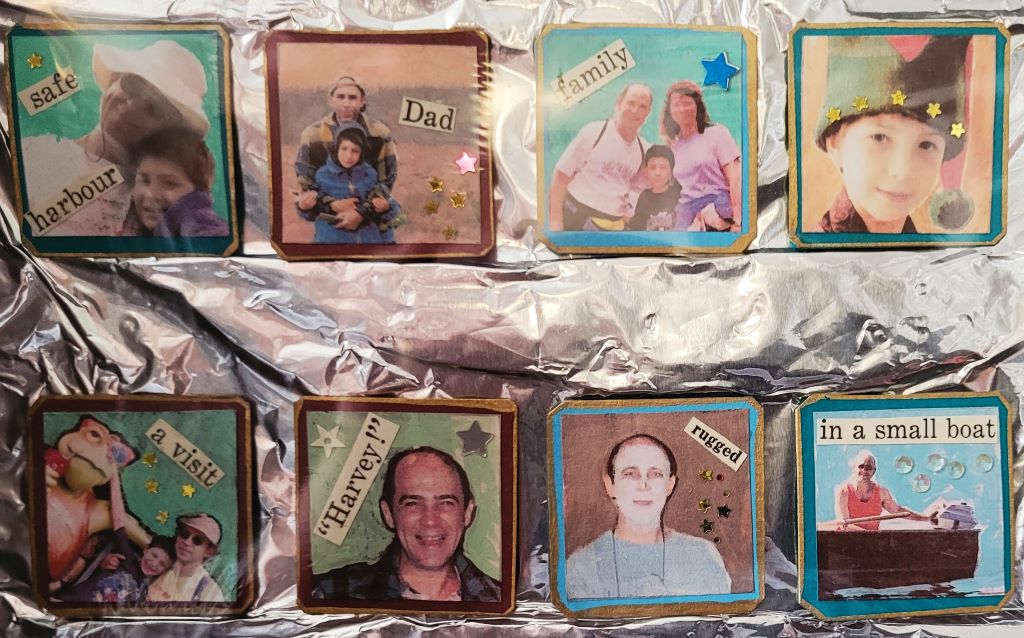
Add some sparkle with tiny stars or sequins. Put a little spot of matte medium where you want your sparkles to go, and put your sparkles on top of it. Tweezers might help or even the tip of a darning needle to push your tiny bits into place. Click on the images above and below to get a closer look at the finished products.
(Tip: If you get matte medium on top of your sparkles, they won’t be shiny anymore – they will be matte!)
Let everything dry thoroughly. And I do mean thoroughly. Then turn your image over, backside up, peel the protective paper off one of your peel-and-stick magnet squares and adhere the magnet to the back of your image.
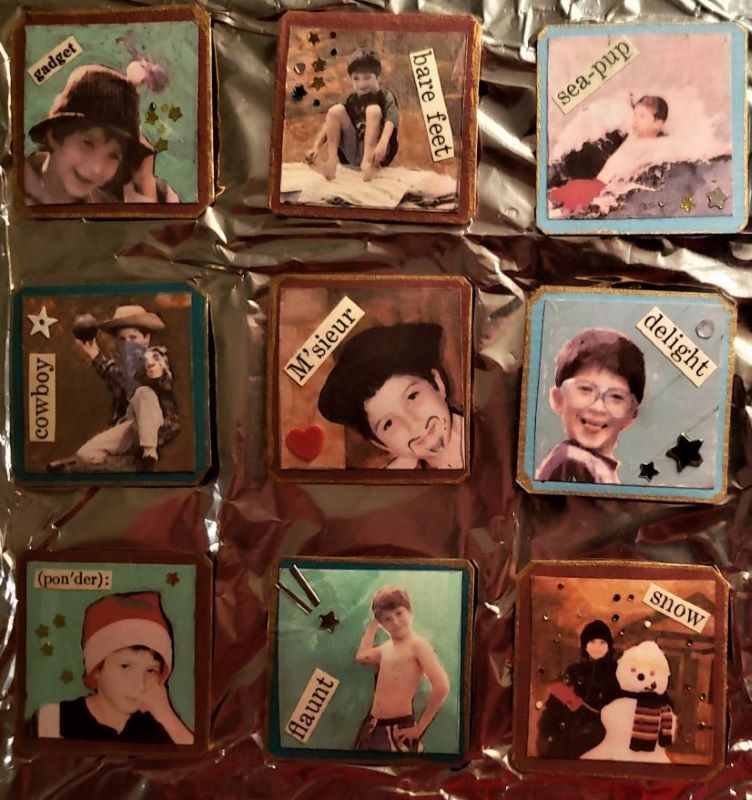
Voila! Magnetic Personalities to share with some lucky recipient.
These magnets were made a lot of years ago, and it is so much fun to have them still – “Little bits of YAY!”
More Stories
Wall of Fame
Signs of Spring
Dream Frame